
Objective: The objective of this tutorial is to setup Android SDK and Android Virtual Device for React Native on Windows 10 machine.
Steps:
The following are the high level steps to complete this process.
1. Install Oracle JDK if it is not already installed.
2. Download Android Studio
3. Install Android Studio and other components like SDK, HAXM (for AVD Acceleration), Build tools, and System image
4. Edit the PATH environment variable
5. Create Android Virtual Device
Detailed Steps:
Let’s go through the steps in detail.
1. Install Oracle JDK if it is not already installed.
2. Download Android Studio (from https://developer.android.com/studio/index.html). This will download the android-studio-bundle-<version>-windows.exe (in my case, it is android-studio-bundle-162.3764568-windows.exe)
3. Install Android Studio and other components like SDK, HAXM (for AVD Acceleration), Build tools, and System image
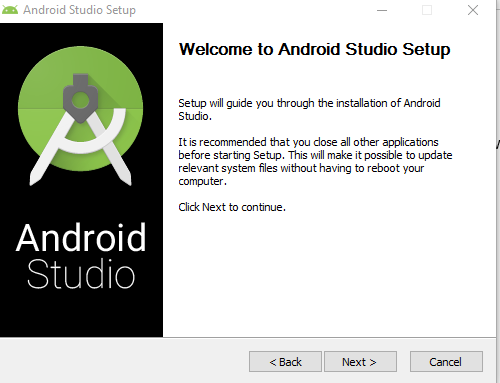
a) Now click the android-studio-bundle-<version>-windows.exe and you will see the below screen. Click “Next”.
b) Check the required attributes and Click “Next”.

c) Click “I Agree”.

d) It will show the default path of installation.
Note that location of Android Studio Installation location:
C:\Program Files\Android\Android Studio
Android SDK Installation Location:
C:\Users\<userid>\AppData\Local\Android\sdk
Click Next.

e) Click “Install”

f) Installation will start, as shown below.

g) Once the installation shows “Completed”, click “Next”.

h) Click “Finish”.

i) The download of the components will start.

j) Once the Android SDK installation is complete, click “Finish” button.

k) You will see the below screen. Click Configure icon at the bottom and select “SDK Manager” from the drop down.

Note: The SDK Manager can also be found within the Android Studio "Preferences" dialog, under Appearance & Behavior → System Settings → Android SDK.
l) Android Studio installs the latest Android SDK by default. Building a React Native app with native code, however, requires the Android 6.0 (Marshmallow) SDK in particular. Additional Android SDKs can be installed through the SDK Manager in Android Studio.
So under the first tab “SDK Platforms”, check the “Android 6.0 (Marshmallow)” option.

m) Under the 2nd tab “SDK Tools”, check all the options as shown in the below screen shot and click “Apply” button.

n) On-click of the “Apply” button, you should see the below confirmation message, click OK button.

o) Now select the radio button “Accept”

p) Also now select “intel-android-extra-license” on the left hand and again select “Accept” radio button. Now click “Next” button.

q) Now it will try to download and install the requested components.

r) Selected 4MB RAM (its upto you, how much you would like to allocate). Click “Next”.

s) Finally, you get the below confirmation saying HAXM installed successfully. Now click “Finish”.

t) Installation will still continue and you will get confirmation for the installation of “Android SDK Build-Tools”.

u) Click “Apply” and “OK”.

v) Also additionally install “Intel x86 Atom_64 System Image”.

w) Click Ok button.

x) Click Apply button and will start the download.

y) Now click Finish.

z) Now click OK. That’s it.
4) Edit PATH variable
a) Android installation by default will add the Android related environment variables (Control Panel --> System and Security --> System --> Advanced System Setting --> Advanced Tab --> Environmental Variables) as shown below. Just in case if they are not available, please add them manually.

b) Also in the PATH variable, ensure that ANDROID_PLATFORM_TOOLS, ANDROID_SDK_HOME, ANDROID_TOOLS are added. In my case, ANDROID_TOOLS was not added by-default, I had to manually add it.


c) Also ensure that JAVA_HOME system variable is also set to your JDK path.

5. Create Android Virtual Device:
a) Close the “Android Studio”, if it is already open. Now open the “Android Studio” by searching in Windows menu and open it in “Administrator” mode.
b) Now open the “AVD Manager” at the top.

c) Just incase if the icon is disabled, in the “Event Log”, see if you see the message “Frameworks detected: Android framework is detected in the project Configure”. Now click the link “Configure”, which will enable the “AVD Manager” option.

d) On-click of “AVD Manager”, you will see the below screen.

e) Click the button "+ Create Virtual Device...", then you will see the below screen. Pick any Phone from the list and click "Next". I selected “Nexus 6” here. Click “Next”

f) Now in the “Recommended” tab, click “Marshmallow” (as React Native support “Marshmallow” at this point). As you can see that Marshamallow system image is not installed, so click the “Download” link and install Marshmallow component.

g) It will now start the download.

h) Click “Finish” once the download is complete.

i) Now select “Marshmallow”, under the “Recommended” tab.

j) Select the "x86 Images" tab, then look for the Marshmallow API Level 23, x86_64 ABI image with “Android 6.0 (Google APIs)” target. Download the “Android 6.0 (Google APIs)”, just incase if it is not already downloaded. Now click “Next” button.

If you don't have HAXM installed, click on "Install HAXM" or follow these instructions to set it up, then go back to the AVD Manager.
k) It will now open the below screen. Keep everything as default and click “Finish” button.

l) Click "Next" then "Finish" to create your AVD. At this point you should be able to click on the green triangle button next to your AVD to launch it, then proceed to the next step.

m) Now you should see the AVD launch as shown below:

No comments:
Post a Comment